The Help Blog Subscribe
A Thunderbolt Bifröst…from Jötunheimr

You are on the road, you have two Macs linked to the same network via your MiFi and you start the transfer of a pile of data...Say 86GB as a random number 😛 Finder does its Schwing Thing and you end up looking at 13 hours of connection/transfer time. You sit and hunt for a firewire cable to reboot into Target Disk Mode (I personally cant be bothered to do either) and you have two choices... a. Get a coffee or 9 and sit down with The Hobbit Novels and The Ring Trilogy and wait it out or... b. Utilise that small thunderbolt cable in your bag to set up a Thunderbolt Bridge How...Dead Easy
1. Link the Macs via the Thunderbolt Ports using the Thunderbolt Cable.
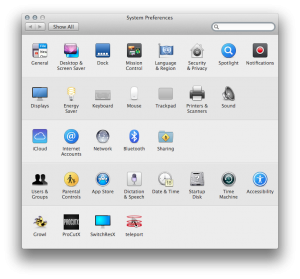
2. Open 'System Preferences' and click on 'Sharing'. Make sure that 'File Sharing' is enabled and the relevant folder where your data resides is shown as shared. Go back to the main 'System Preferences' page.

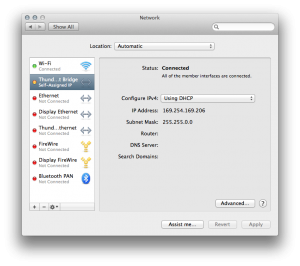
3. Now click on 'Network'. This will show you the Thunderbolt Bridge with a 'Self-Assigned IP'. Thats normally not great in outward networking terms, but here its a good thing. Make a note of both of the IPs for your computers (e.g. 169.xxx.xxx.xxx)

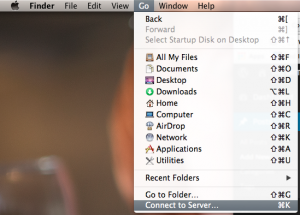
4. Open Finder and on the top menu bar click 'Go' then select 'Connect to Server'

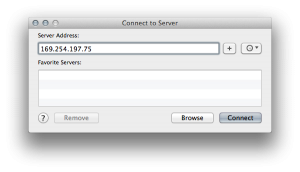
5. In the resulting window, type in the 169.xxx.xxx.xxx IP of the OPPOSITE computer. Hit OK (You'll probably need to give your Administrator Login/Password). A window then opens showing your shared folders. Select the files you want and drag them to your local machine to transfer as normal.

Four minutes later (if you have two SSDs doing the work) You're Done. 86GB copied from one machine to the other.
Ewen
Author

Ewen Rankin
 Dropbox Storage Issues – Selective Sync
 Fusion VM import woes
 Un-Windows 8 Your PC
 Sonos and Spotify Stop Talking…
 Ejecting a DVD from a Mac device